![]()
 When you search out bread recipes—whether in artisan baking books or on the Internet—you quickly notice patterns: the breads with an open, irregular crumb are all made from very wet (high hydration) dough and the recipes commonly feature preferments, slow rises, a particular hand kneading technique, and carefully pouring boiling water into a very hot oven. But only the wet dough seems unique to them.
If you look around Internet (including our own site), you quickly come to the conclusion that the wetness of the dough is what gives rise to the crumb. For example, a random artisan bakery says:
The amount of water in a dough defines the type of bread it will make.
Looking in books seems to support that. For example, The Bread Baker’s Apprentice classifies breads based on their hydration, referring to the wet ones as rustic.
Can it be that easy? To get an irregular, open crumb, just add water? Sure, without all the other steps, it won’t be quite as tasty, but home-made sandwich bread even without those steps is still tastier than the supermarket stuff.
This calls for an experiment!
Procedure
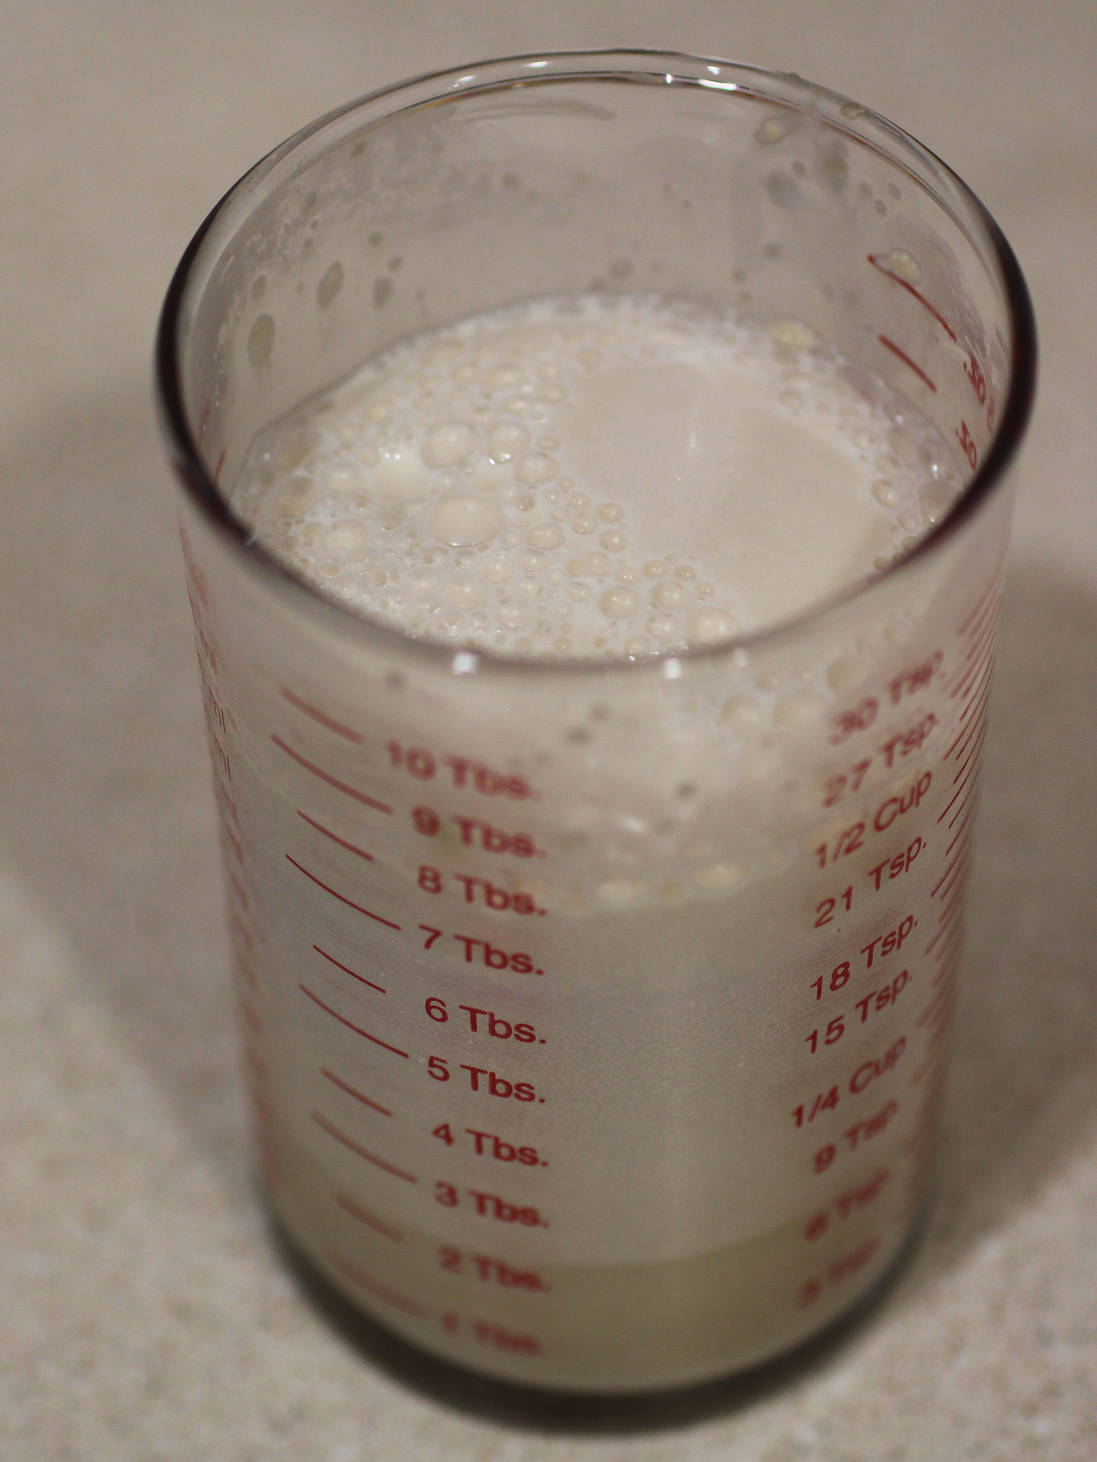
- Heat 50g of the water to 115°F (46°C)
- Add the sugar to the heated water
- Add the active dry yeast to sugar-water mixture.
- Set yeast-sugar-water mixture aside.
- In the Zojirushi bowl, combine the rest of the water, the flour, and the salt.
- After yeast-sugar-water mixture has foamed, pour into Zojirushi bowl.
- Press the “start” button on the Zojirushi. It will mix and knead for a factory-programmed length of time, approximately 20 minutes.
- When the Zojirushi switches from the knead cycle to the rise1 cycle, cancel it, and transfer the dough to an oiled mason jar. Cover with plastic wrap.
- Allow the dough to rise, at room temperature, until doubled in volume.
- Wrangle dough out of mason jar onto oiled glass cutting board. Press out to size of a loaf pan, and three-crease into loaf shape.
- Transfer dough to loaf pan, cover with oiled plastic wrap.
- Allow to double again. While doubling, preheat oven to 350°F.
- Remove plastic wrap and bake in preheated 350°F oven.
The Experiment
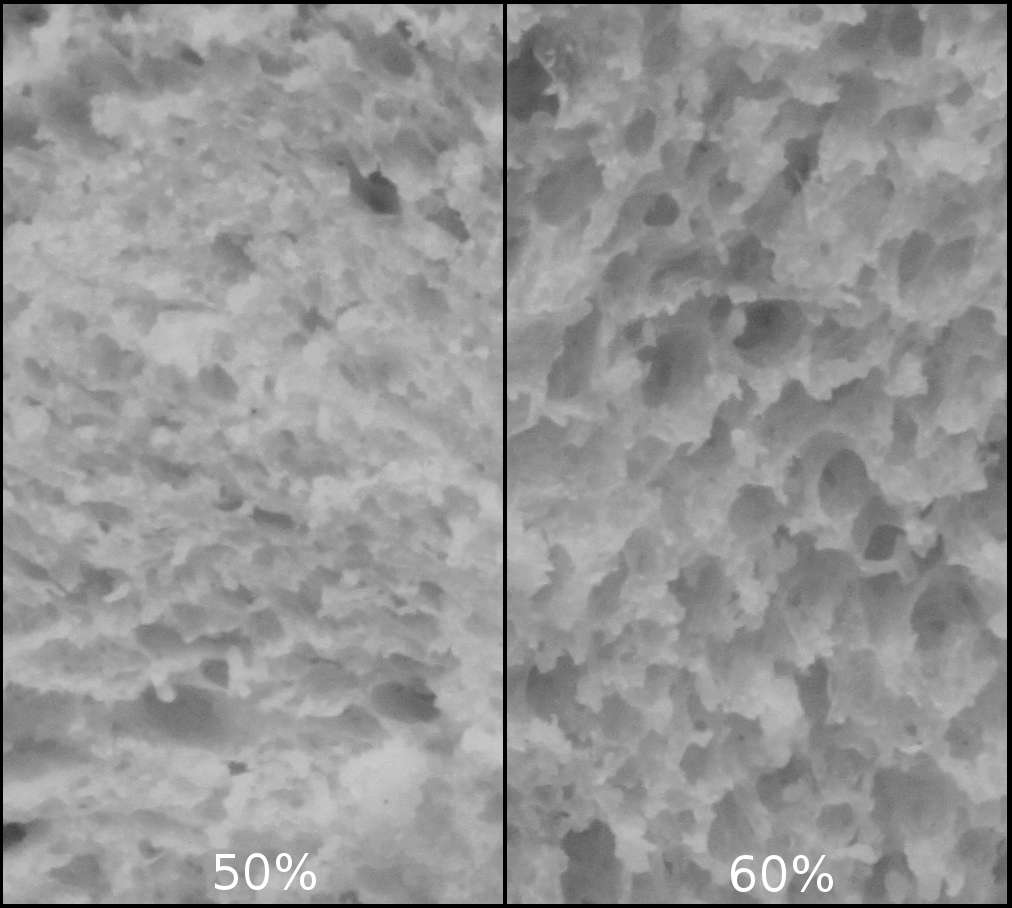
Day 1: 50% and 60% Hydration
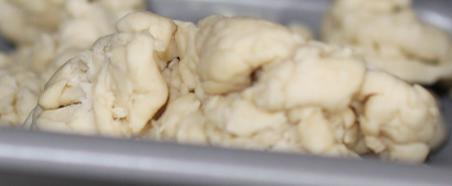
The first dough I made was at 50% hydration, and the bread machine was barely able to turn it into dough at all. As you can see from the picture, it was a mess of individual clumps. All the flour was, however, hydrated. A little bit of work by hand—performed before placing it in the mason jar—got it to at least stick together (this wasn’t required for any of the other hydrations). The 50% hydration dough didn’t stick to anything, including itself, so it was difficult to form.
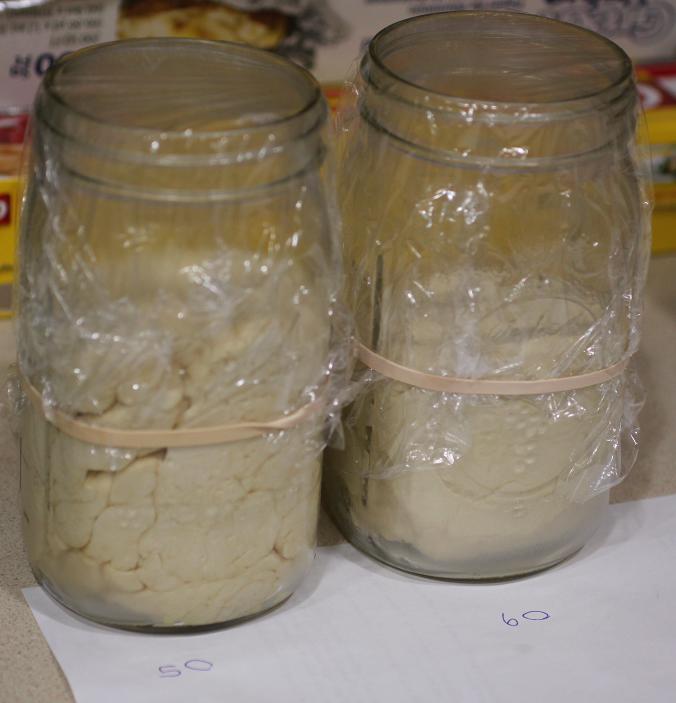
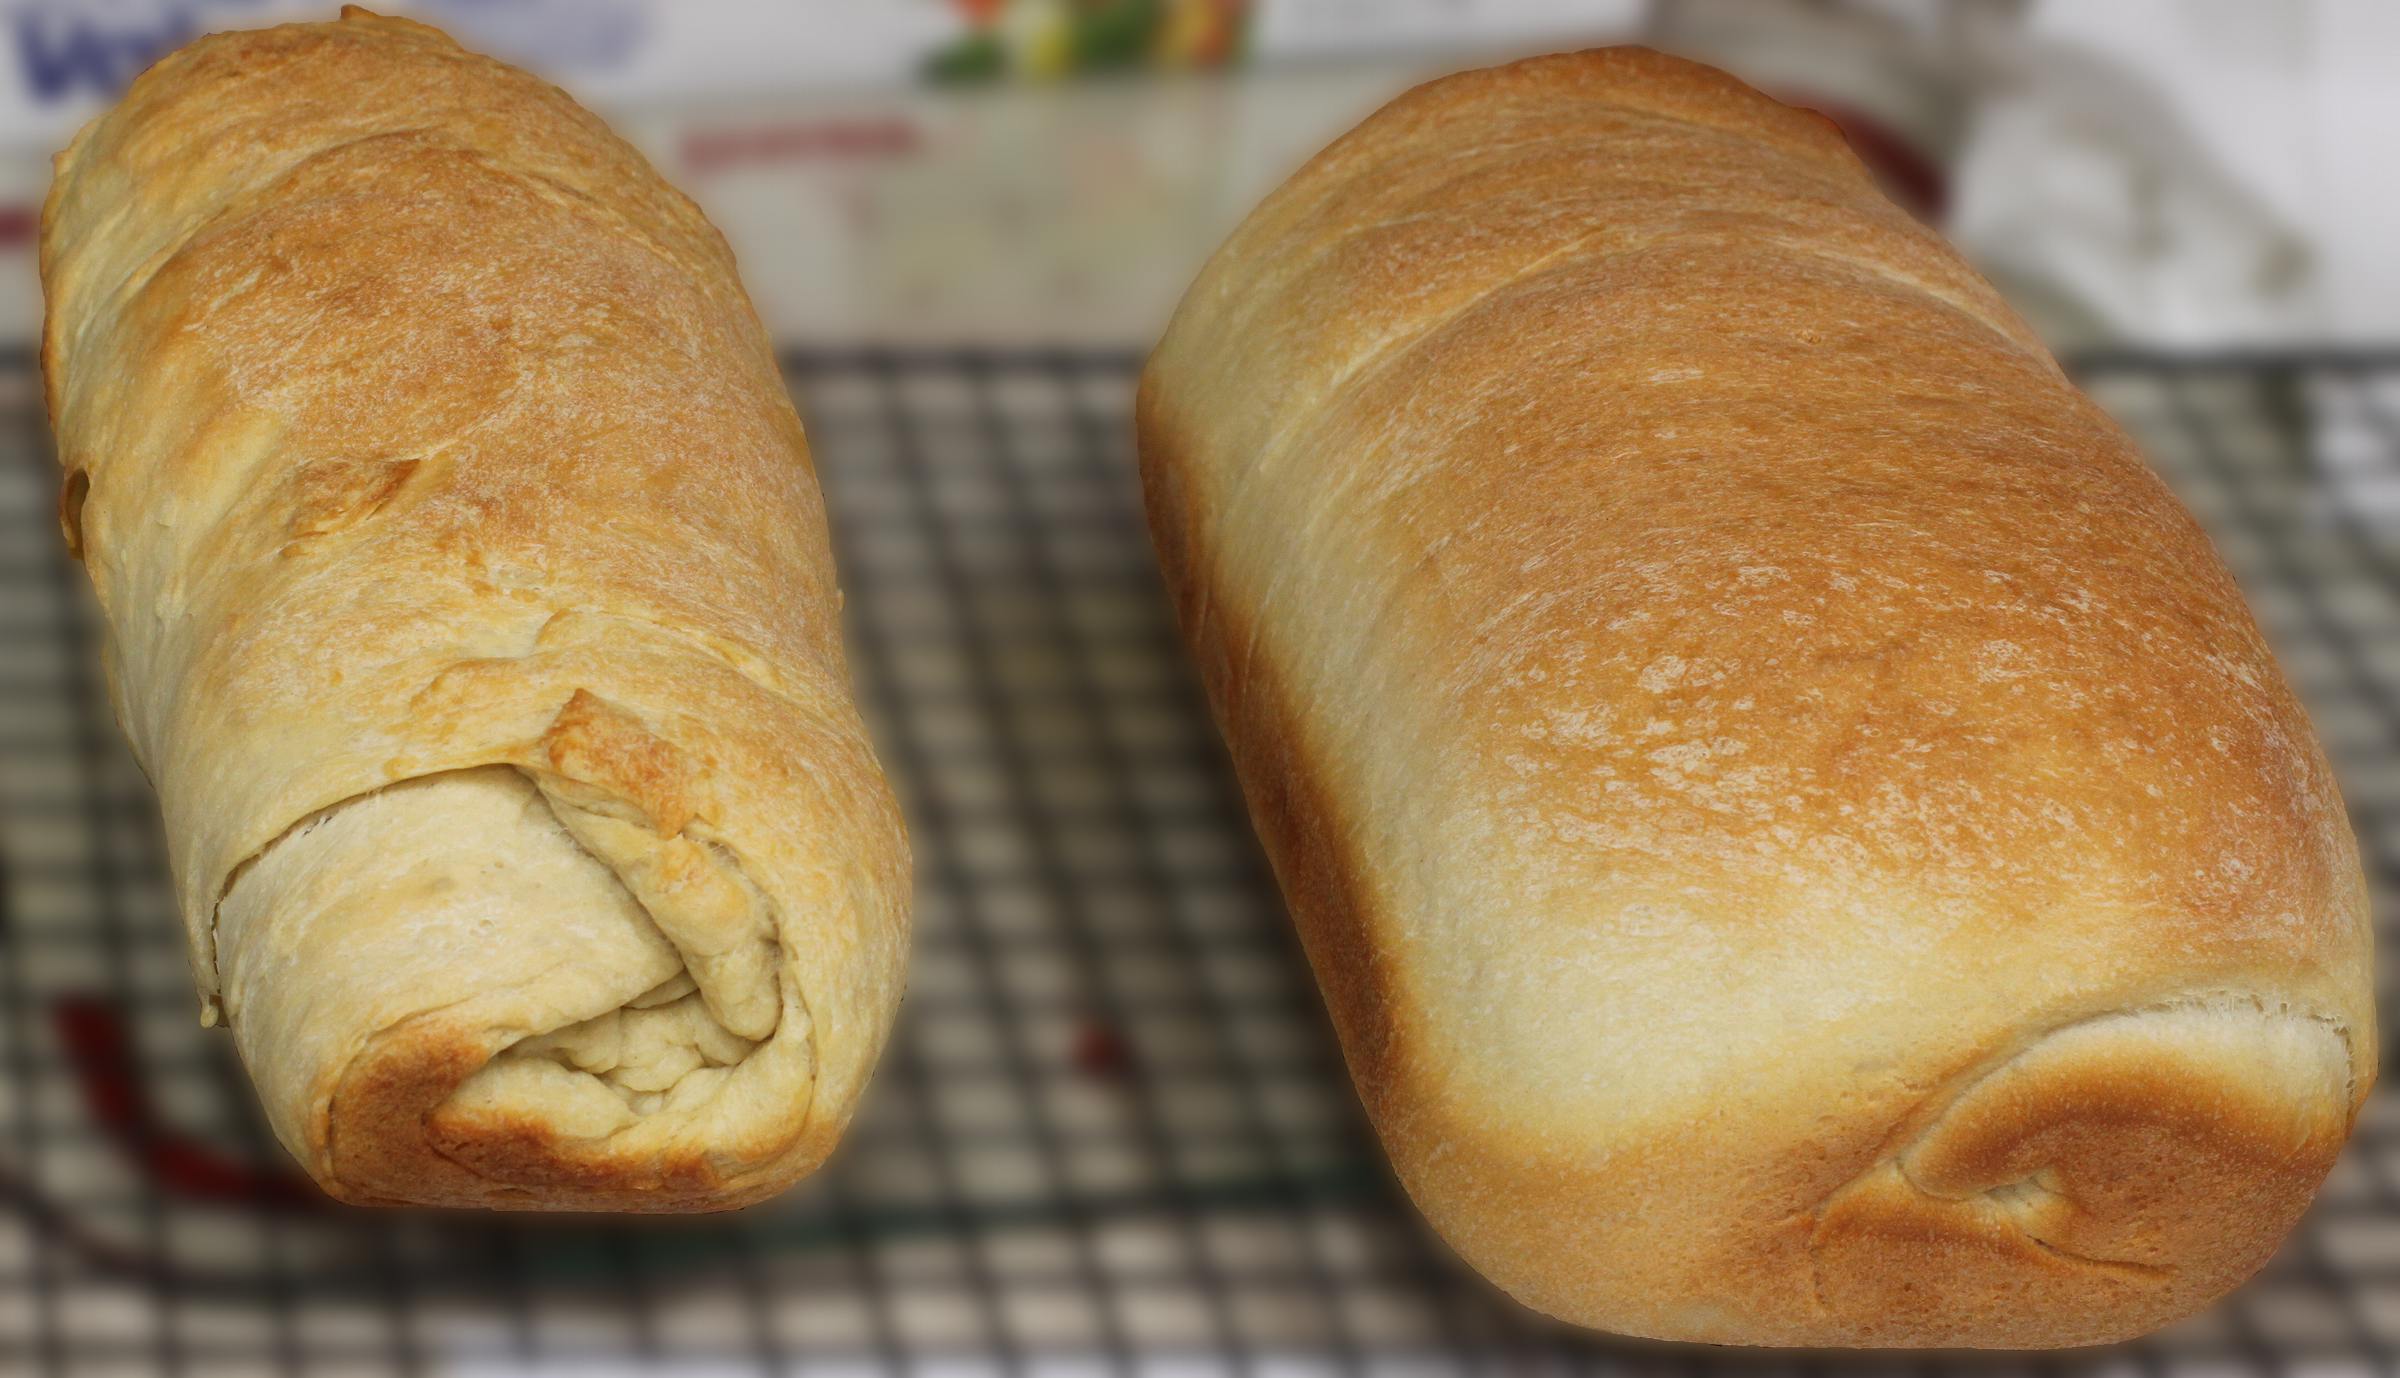
The 60% dough worked much better. The bread machine was quite happy with it, and easily formed it into what I’d expect for bread dough. You can clearly see the difference in both the mason jars and the baked loaves; there are pretty notable differences in the crumb as well (click any of the images to enlarge). Interestingly, despite the 60% coming out of the bread machine ~½ hour later, both were ready for the oven at the same time (though I unfortunately didn’t record how long each took).
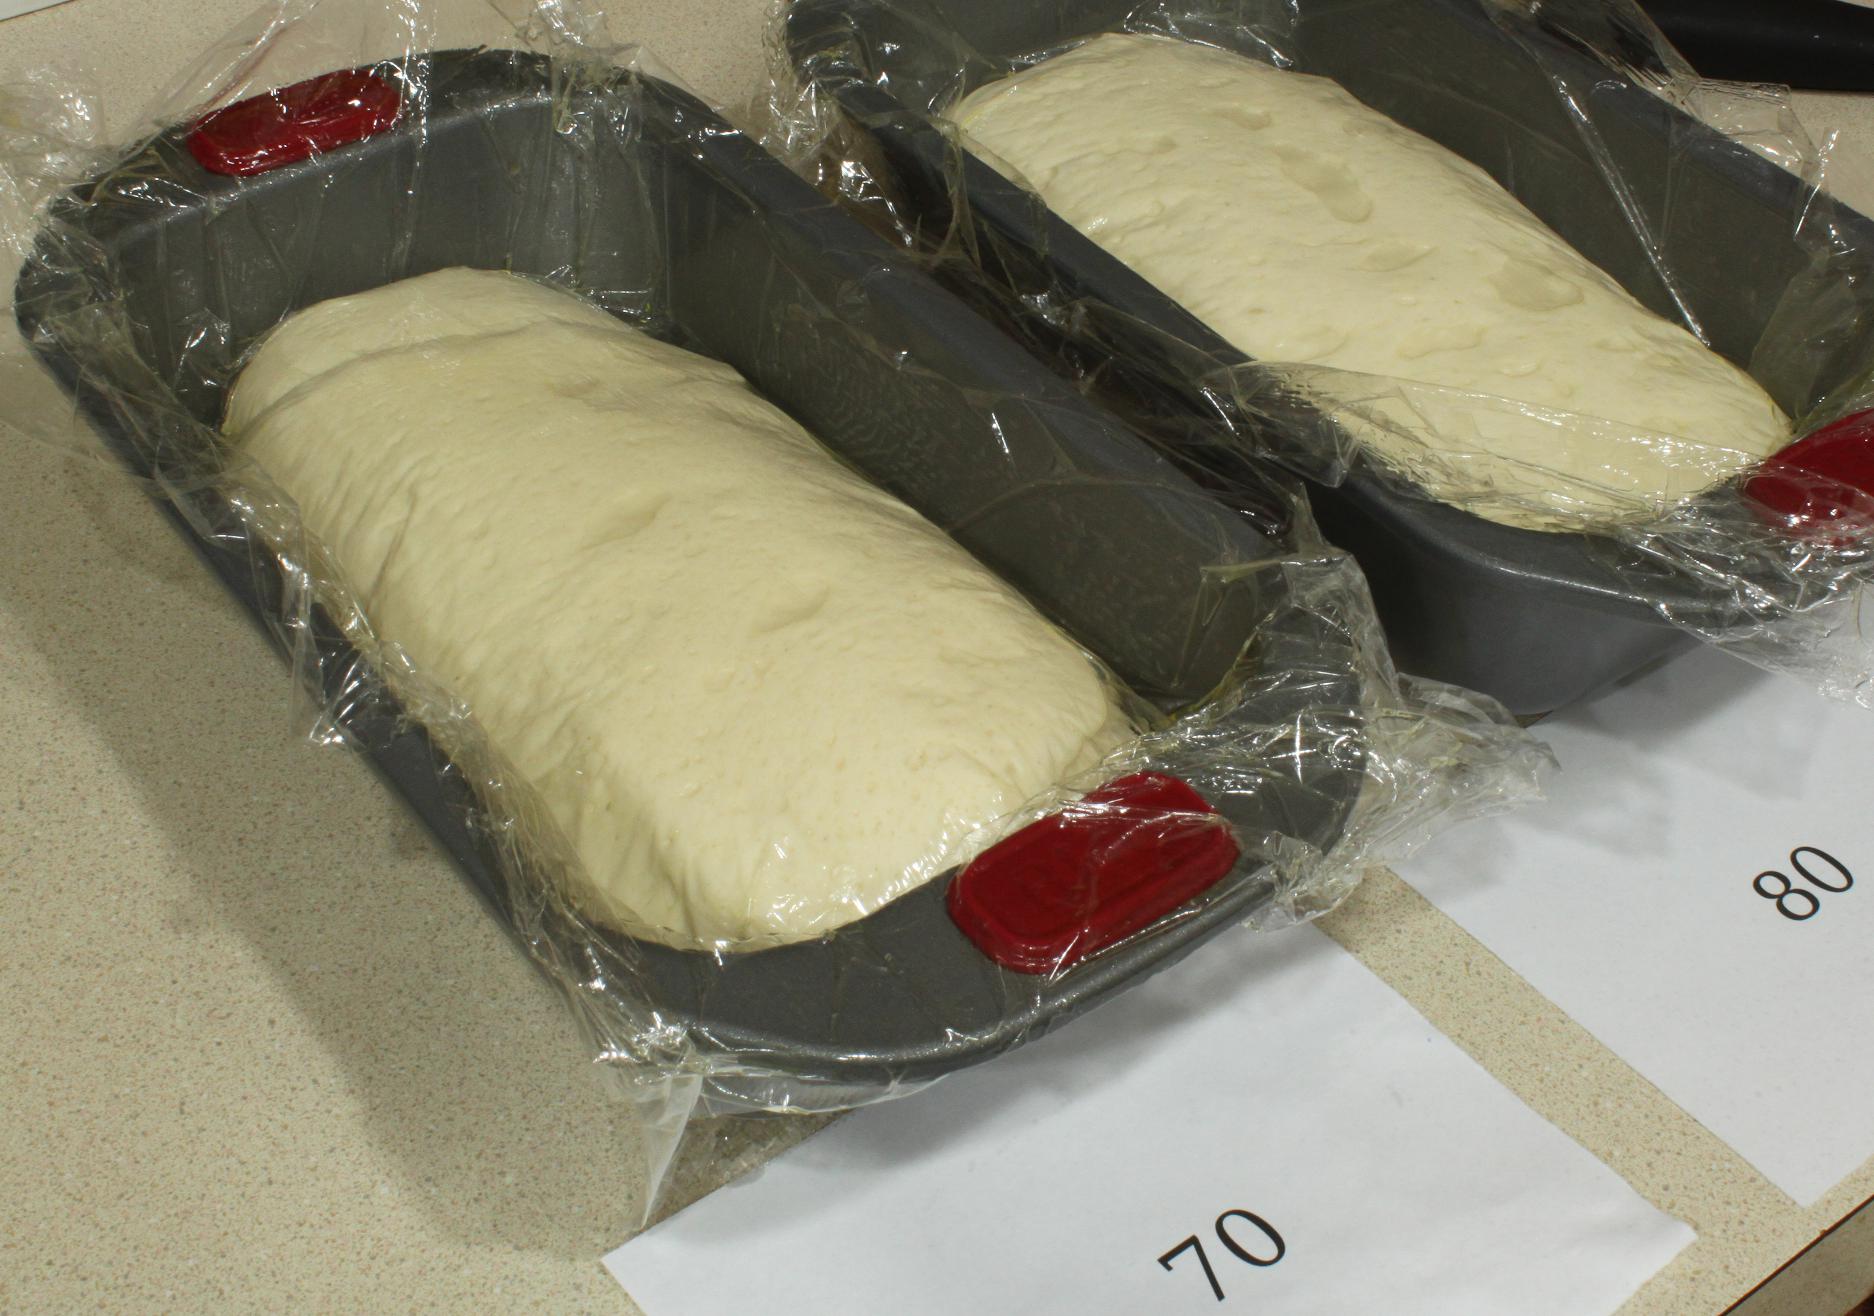
Day 2: 70% and 80% Hydration
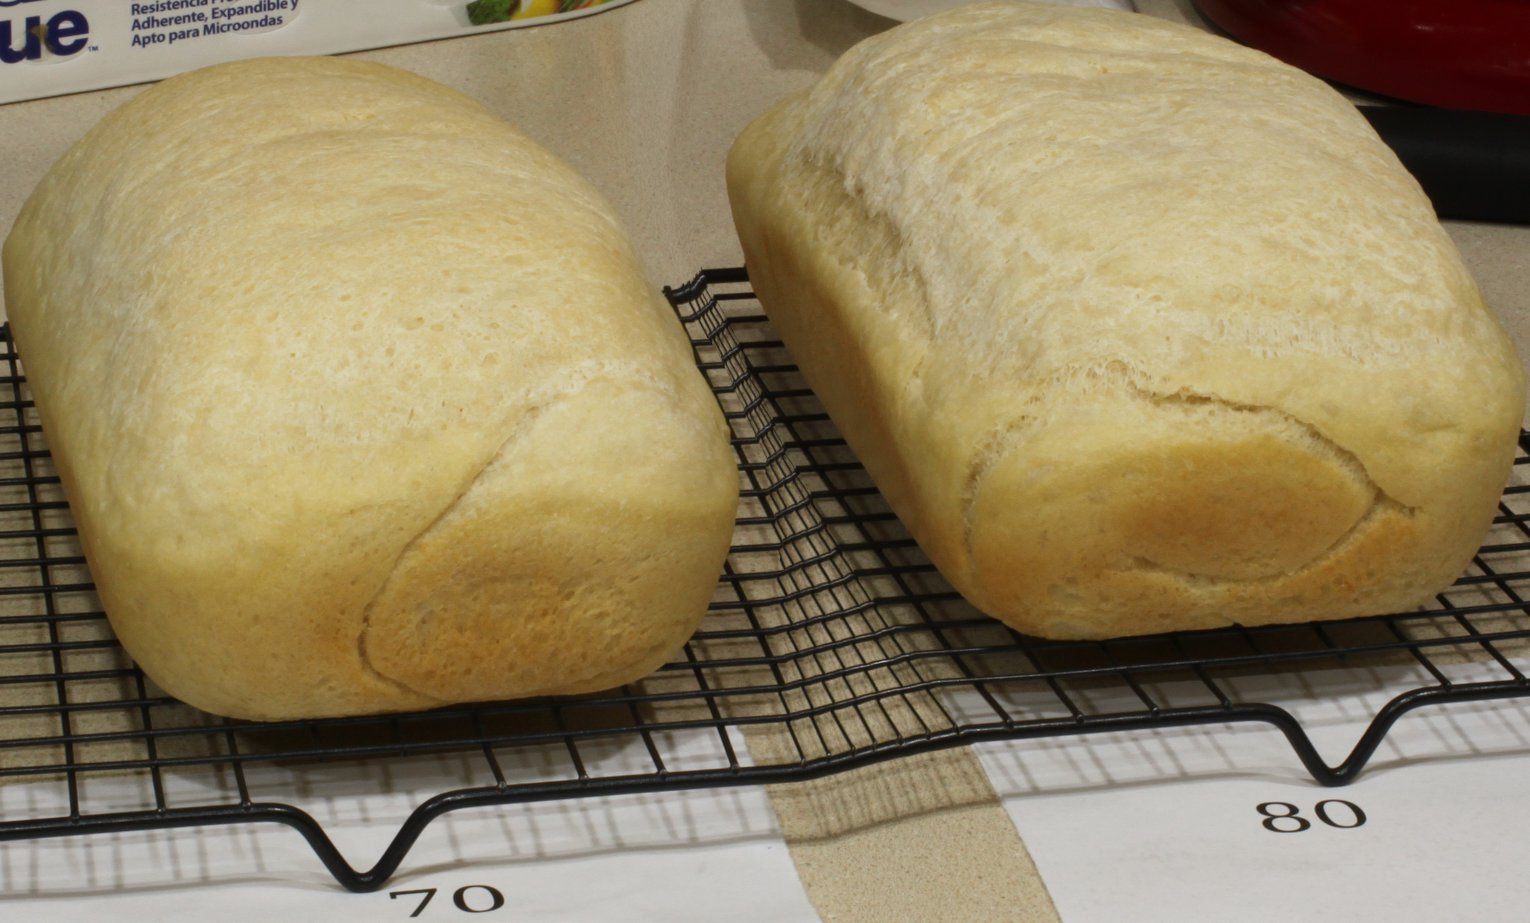
70% worked fairly well, and wasn’t that bad to work with. The bread machine was still fairly happy with it. 80% was a different story; the bread machine had trouble kneading it. It also was more difficult to keep shaped when transferring (it didn’t really hold a shape, immediately stretching wherever I wasn’t supporting it), and loved sticking to everything.
Once again, despite the 80% coming out of the bread machine second, it was ready to go into the oven at about the same time—possibly even a little earlier—than the 70%. Both of these were fairly quick to rise, and the taste was notably worse—especially for the 80%. Also, not much browning occurred in the oven.
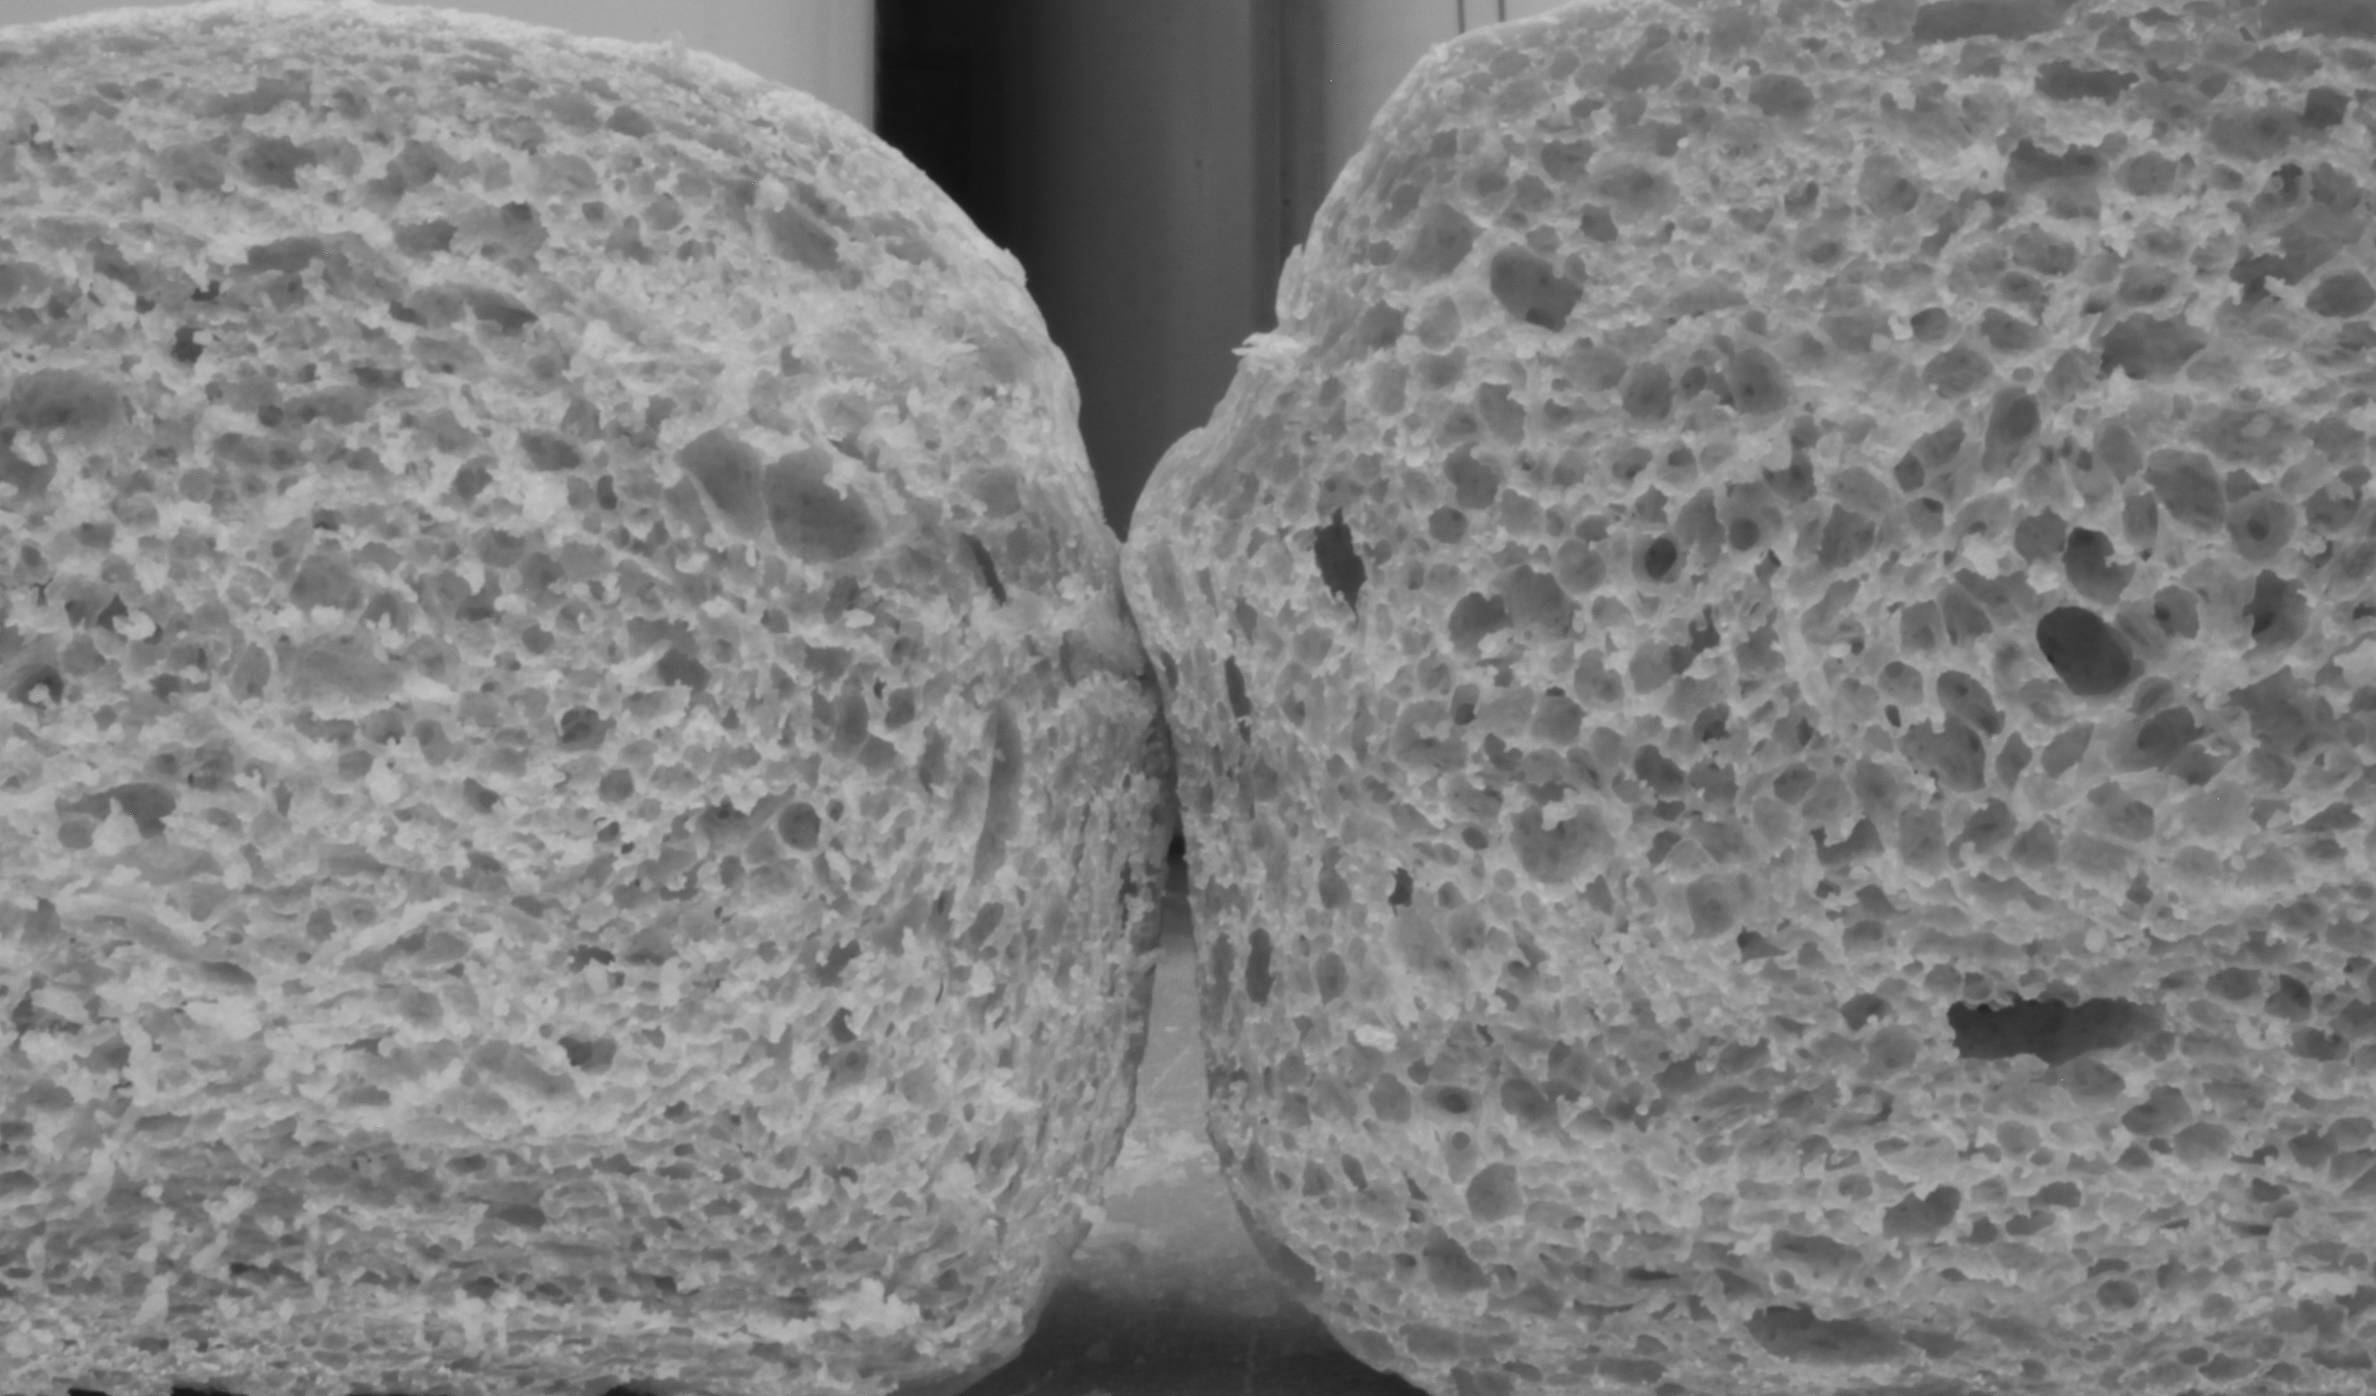
When I look closely, I think I see that the 80% crumb is more open, but its not dramatic.
Conclusion
Except for the 50% hydration bread—which didn’t even form into a smooth dough during the bread machine’s kneading—the crumb wasn’t that much different. The higher hydration crumbs are a little more open, but nothing dramatic—and certainly nowhere near what you’d expect from an 80% hydration ciabatta.
The most dramatic effect that increasing hydration seems to have is on rise time (faster) and taste (worse). I suspect those are related; pretty much every modern source says slower rise is leads to better flavor. This is probably why most high-hydration recipes use refrigeration, very low yeast amounts, preferments, etc.
Future Directions
The stretch-and-fold kneading technique is an obvious (to me, anyway) next thing to investigate as the cause of the unique crumb of artisan high-hydration breads.
The 70% and 80% browning far less than the 50% and 60% surprised me. Its somewhat worrying, as the more-browned loaves were done on a different day than the less-browned loaves. Though I’m not sure what could have changed: humidity and temperature inside the house are controlled; oven temperature was checked with an IR thermometer, pointed at the stone on the bottom rack. Its of course possible that the higher hydration just leads to more surface moisture (which of course stops browning).
Its possible the bread machine would be able to mix the 50% dough better if there were a slight bit more of it—say, 400g of flour.
(Update @16:30): This experiment only uses a bread recipe for easy sandwich bread, the type that you’d throw in a bread machine and let it do all the work. It doesn’t address if hydration matters when combined with all the other steps involved in making artisan bread; that is a good question for future work.
More Pictures
Unedited versions of the pictures featured, as well as additional photos, are available at Bread Hydration Experiment on Flickr.
Filed under baking experiments
Tagged: bread
Congratulations on becoming our first author! Thank you for writing the nice post, this was a good experiment and quite informative.
Well done. This is very interesting.
I am interested to see how the hydration affects slow-fermented, free form, artisan loaves.
350F is very low for high hydration breads. What determined how long you baked the loaves? An 80% loaf will need to bake longer than a 60% loaf. You may have isolated just hydration, but not in a method that anybody would actually bake the loaves.
The loaves were baked long enough to get to 200°F internal. When I cut into them, all appeared to be adaquately baked (and none were dried out), so I think the baking time right enough (though I suppose that leaving them in longer would have browned the 70% and 80% loaves more). Also, once the starch is geletanized, I wouldn’t expect the crumb to change much.
Doing all the high-hydration methods on both a 80% and a 60% loaf (to the extent possible, stretch and fold will be much harder…) would be an interesting future experiment. Or maybe a 70% and 90%, both of those will probably work with the high-hydration techniques.
Excellent! Very informative. I can’t wait for your folding report…
What I’ve read and informally tried is a higher backing temps. Even to the point of setting the oven to a higher than baking temperature for the preheat to get a faster recovery to baking temperature when you open the oven to put the bread in.
With a higher baking temperatures than 350F… More like 500 – 450F.
Hi, thanks for the information. I want to ask something maybe someone can give me the answer. currently i’m working with 45% hydration dough. i’ve been working with this recipe quite some time with no problem at all. one day i made a mistake of not adding the sugar into the recipe, and when i mix the dough instead of forming a ball, it ended up with individual clumps. i did the mistake twice in a row with same result. then i realized that i forgot to add the sugar into it. with the sugar added, the dough as usual, form a ball and ended up good. my question, how does sugar affect the hydration of the dough? thanks
I’m not sure. Sugar melts (and this becomes liquid) during baking, but I’d not expect it to do that when mixing/kneading. Sounds like a good question for the site.