![]()
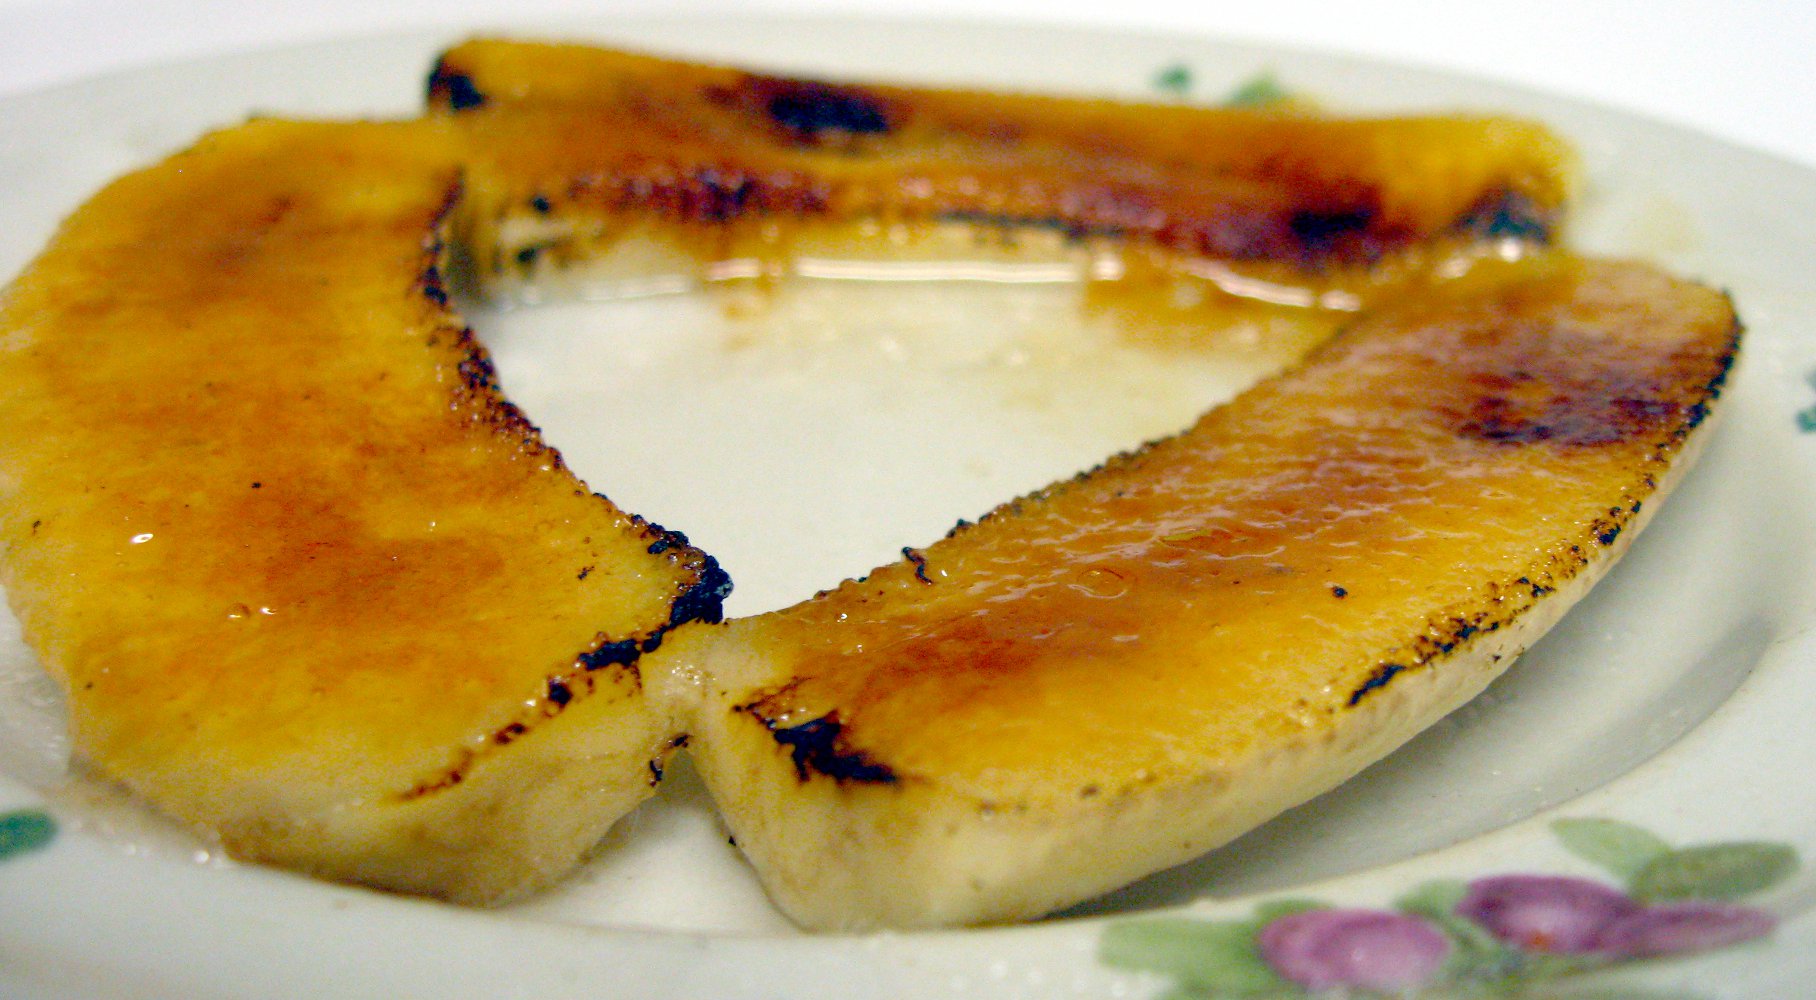
A gourmet dessert for less than the cost of a Mars bar.
A couple years ago, I decided to learn professional cooking the hard way: take a dishwasher job in a local fine dining restaurant, and work up from there. This put me in a pickle: I had to balance my budget on a dishwasher’s meager wages. Ironically, the only way to do it was by cutting back on something I loved: food and wine!
I had to cut the average weekly grocery bill to about $30/person; however, I still wanted to regularly cook gourmet meals. Even though I read everything I could find about saving money on groceries, the most useful strategies came from watching how restaurants keep food costs low to turn a profit.
There are several strategies restaurants employ: first, they plan their menu and preparation so that one step can be used in multiple dishes, and one ingredient in many ways. For example, beef stock is reduced and used in several sauces. Second, they also use strict storage techniques to ensure cooked dishes can be safely served for as long as possible, reducing waste. Third, they know market value of standard foods and negotiate with multiple suppliers to get deals. Fourth, they use tricks to employ cheap ingredients where possible, allowing them to showcase premium ingredients where they count the most. For example, port reductions used a cheap American port, but were served with top-notch meat.
Today, I will tackle the first topic: menu planning.
My variable schedule doesn’t always leave much time to cook, so when I do a longer cooking project it has to provide some speedy, inexpensive meals too. I dislike the inflexible “Monday is pasta night, Tuesday is beans, …” style of meal planning, because it doesn’t allow room for experimentation or spontaneity. Instead, I use a 3-part planning system:
- Planned meals
- This is where the gourmet fun happens! I plan involved, fancy dishes several days in advance. This way I incorporate the perishable ingredients I have and get the best deal on other stuff. Planned meals are scaled up to produce delicious leftovers, which are cooled as quickly as possible to keep them fresh for several days. This way one night of vigorous cooking can produce many tasty meals.
- Flex meals
- Fast, flexible dishes that I can cook in 10 minutes or less, and with minimal cleanup. This is how I eat when I lack time or energy to deal with major cooking. Often, these incorporate leftovers or a partially-prepared item, such as cooked but unflavored pasta.
- Dish combos
- Several dishes cooked in sequence, where each one uses leftovers or byproducts of the previous one. Often this is to get the maximum use out of an expensive meat or fish.
A planned meal
For example, a planned meal, beef bourguignon in a sourdough bowl:
- Wine: Use super-cheap, no-name pinot noir. I keep a couple bottles in the pantry and restock when I see more at the store. Cost: $3–5
- Beef Stock: Thaw frozen beef pot roast dripping/stock from previous meals and use as stock. Free flavor!
- Mirepoix: Onions come out of the fridge, carrots and celery I get at a store with cheap produce. All of them are browned for a richer flavor. Costs: $4 or less.
- Bread bowls: Bake small sourdough boules during normal, weekly bread baking. Do a double batch and use additional portions as weekly bread (cost $1–2). I buy flour and yeast in bulk where they’re cheap, which saves money.
- Beef: chuck/round roast, manager’s special (marked down for fast sale). Cheap cuts are best here, because the long cooking turns tough connective tissue into soft gelatin. Cost: under $10 for several pounds of beef.
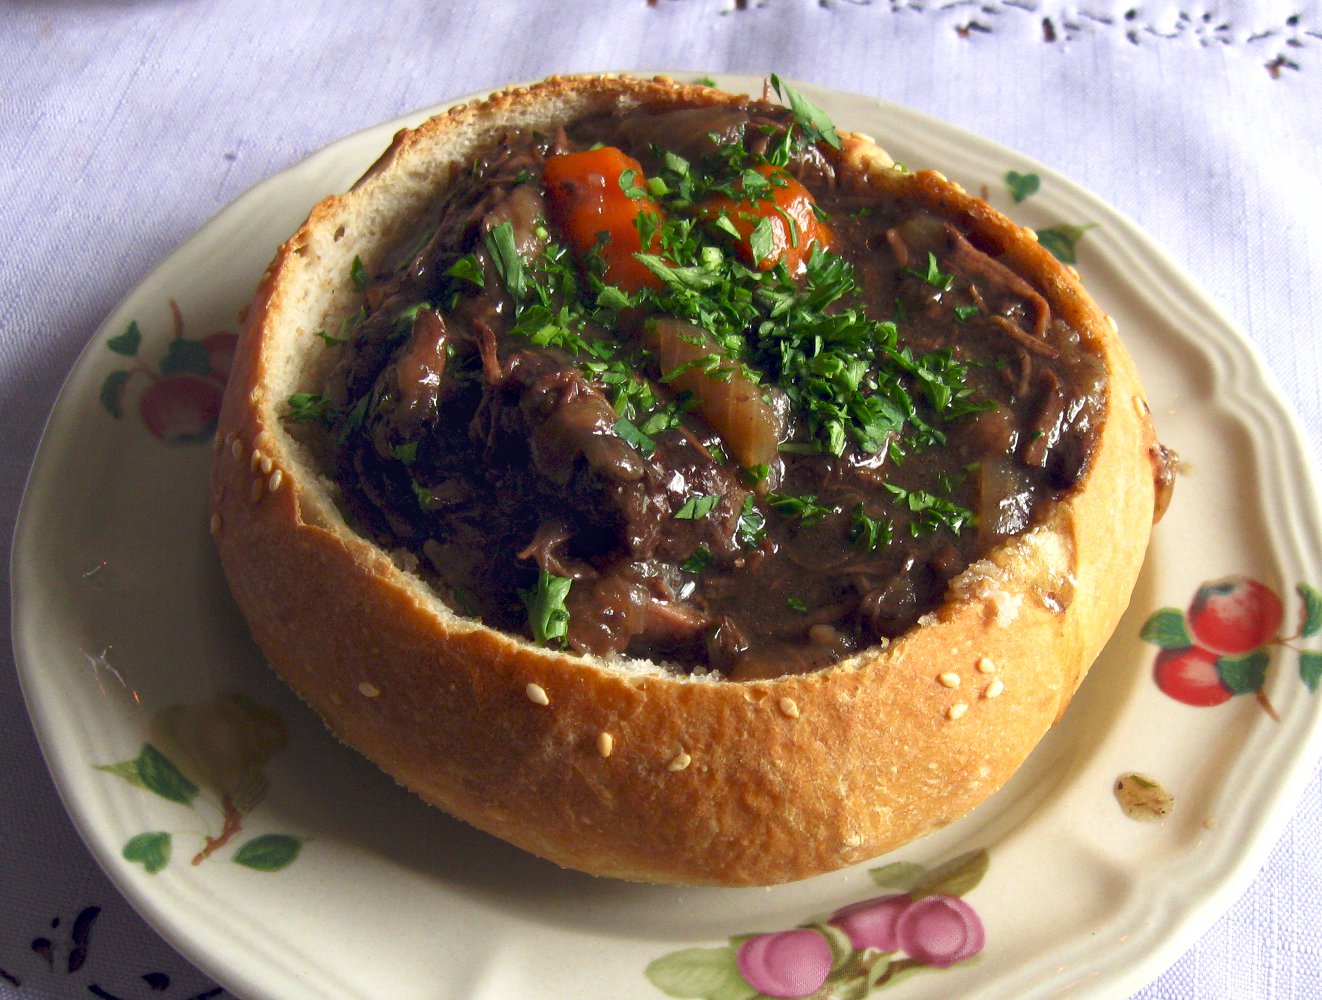
Beef Bourguignon in a Bread Bowl: 6–8 portions for the same price as a basic dinner out.
Beef bourguignon for about $18, or about $2–3/meal, yielding at least 6–8 hearty servings (when combined with bread). The edible bread bowl soaks up sauce, and becomes a sumptuous treat. It also helps stretch the relatively pricey beef. Homemade stock saves money and adds flavor, the perfect combination! Leftovers can be served over rice or with bread dipped in, to stretch them out further. Not as cheap as rice and beans, but not unreasonable on even a shoestring budget.
Flex meals in practice
As I said earlier, these are fast and take minimal labor. The idea is straight from restaurants: you do the most time-consuming preparation or cooking in bulk, then just do the finishing steps before serving. I like to cook a basic starch, such as bread, pasta, or rice, early in the week. Then I play mix-and-match with produce, sauces and leftovers to make many different meals throughout the week. Homemade bread is a great example, since you can turn this into an infinite variety of sandwiches.
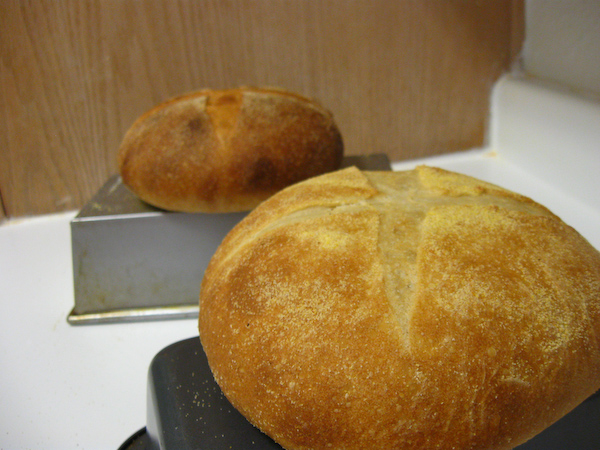
Homemade bread: time to make sandwiches!
Take another example: rice. With the same pot of cooked basmati rice, I can do the following during the week:
- For a Mediterranean flair, reheat in the microwave, and add diced tomato, thyme, garlic, paprika and olive oil.
- For dessert, mix with milk/cream, sugar, cinnamon and nutmeg, and heat, to get a fast rice pudding.
- To add a Thai twist, toss in a tablespoon of peanut butter, some special curry blend (from the local Indian mart), turmeric, rice vinegar, garlic, and chili flakes, and microwave.
- Fast Japanese: beat a raw egg, soy sauce, and rice wine vinegar and pour over rice for tamago kake gohan. It sounds weird, but it’s delicious and filling!
Other examples of flex meals include salads and soups. You can also precook unseasoned pasta and then season on the fly with a quick sauce when reheating. None of these take more than ten minutes to make with a microwave, and require only a cutting board, knife, and eating dish.
A killer dish combo
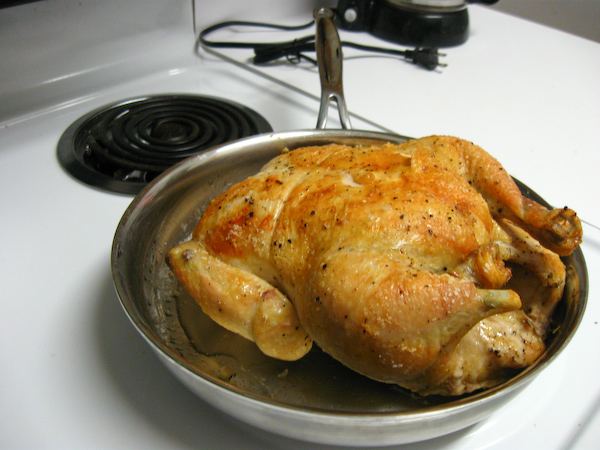 Dish combos are an awesome way to get more use out of your ingredients! My favorite combo is a 1-2-3 punch of roast chicken, chicken sandwiches, and finally chicken stock:
- Roast a whole bird! With sides, this makes a hearty meal for two or more, and the meat costs around $1/pound.
- Trim the carcass for meat, to go into sandwiches or pilaf.
- Take stock! Simmer overnight or pressure-cook the carcass with browned mirepoix (cut carrots, celery and onions) and strain, to make stock. You get several quarts of liquid gold. This stock can be used to enrich rice, pasta, soups, or sauces with hearty chicken flavor.
By doing a combo, you turn one bird (plus trimmings) into many meals, and nothing goes to waste.
I even freeze the drippings for gravy or enhancing bland dishes. Since ingredients are cooked in the first dish, you have several days to execute the full sequence, giving flexibility to work with a busy lifestyle.
Other easy ways to create combos include:
- Bake aging bread into croutons or bread crumbs, using garlic, salt, pepper, and seasonings.
- Simmer the peel and tough parts of cut pineapple to make a refreshing agua fresca. You only need a little sugar and a pinch of salt.
- Save bacon fat, and use it when roasting vegetables. Or, strain and cool it, then refrigerate. It’ll keep for a very long time, and adds flavor to almost anything savory!
- Use egg yolks in a sauce, turn the whites into meringues.
- Have a baguette & cheese for lunch, then slice the remainder for bruschetta the next day.
There are a few tricks to make this system work its best:
- Cool leftovers fast, to keep leftovers safe to eat for several days. Promptly refrigerate, leaving the lid of the storage container open slightly in the fridge to allow steam to escape.
- Cool hot liquids in an ice-water bath so they don’t stay hot and breed bacteria. This is a trick I picked up in restaurants; large containers of hot liquid can stay hot for hours before the fridge cools them, long enough for bacteria to breed to dangerous levels. This way they reach a safe temperature rapidly, and stay usable for days.
- Don’t buy perishables without a plan. You should either have a planned meal that uses them up, or flex meals that can incorporate them easily. A single steak that spoils, unused, can wreak mayhem on a limited budget.
- Freeze, freeze, freeze. Soups, pilafs, casseroles, bread, and pasta dishes freeze well. Big pieces of meat do not freeze well. Use the freezer to stock up easily defrosted, fast meals for when you need food and don’t have time to cook. Note that bread reheats much better in a toaster oven than a microwave.
- Stock up on nonperishable ingredients. The variety you get in flex meals is determined by the variety of spices, vinegars, oil, and seasonings you have to play with. Local ethnic markets can yield some amazing ways to spice things up.
In summary
With these strategies, you gain flexibility and can eat cheaply while still enjoying gourmet meals. With planned meals, you can use smart shopping to get the ingredients needed at a good value. By using all the products of your cooking, you ensure nothing gets wasted; the same groceries yield more meals. Incorporating leftovers and flex meals saves your time and labor. It also means you don’t need to pay a premium for ready-to-eat processed foods. This frees you to really go insane on the gourmet, planned meals.
[editor’s note: This is part one of a several-part series. ]
See also Shoestring Gourmet Part 2: Playing the Grocery Game for Keeps
Filed under budget cooking guides
Tagged: meal planning, meat, recipe, shoestring gourmet
Some sensible ideas for getting more pleasure out of food—and life—on a budget. The homemade bread looks absolutely scrumptious!
Could you clarify what an Icewater bath is? Do you mean putting ice water inside whatever liquid you’re speaking of or just…?
Thanks and great blog post!
@Johnathan An ice-water bath is a large container containing ice with enough water added to allow it to cover the ice. To use one, you immerse the whole container of stuff to cool in the bath until the ice-water reaches 2/3 to 3/4 up the side of your hot container. This is one of the fastest ways to remove heat from a large pot or bowl of liquid, because the ice water won’t heat much about the freezing point of water, and it conducts heat much more efficiently than air. This means things cool much faster than in the fridge or freezer.
I have always worried that the ice water bath would damage my pots. Is that not true?
@MJ Unless they’re flaming hot, your pots will be fine as long as you take them off the hot burner to cool for 10 minutes or so before throwing them in the ice bath. This lets the pots cool enough that they won’t warp. It also allows some steam to escape, cooling the dish. For good stainless-clad cookware you can probably throw them straight into the ice water without fear. Except for really thin nonstick or aluminum pans, I think the fear of warping is greatly exaggerated; I’ve seen cooks throw pans hot off the range into a sink of dishwater without consequences.
If you’re worried about your cookware, you can also dump your food out of the pot into a cheap stainless bowl, and then put the stainless bowl in the ice bath. I do this when I’ve cooked in something (stoneware, glass) that probably shouldn’t be heat-shocked at all.
Also, stir the pot (or bowl) when it sits in the ice bath. You don’t need to stir constantly, but once a minute or so. The more you stir, the quicker it’ll cool, and thus the longer it’ll keep.
transfering to a different vessel also means you don’t have to deal with the thermal mass of whatver the original cooking vessel was. (as you don’t necessarily need to cool that down as quickly as you need to cool the food)
You can keep a mother dough for years, this way you can economise on yeast. Just add a little flour and water to the mother every week, and it’ll keep forever.
Can you please post the recipes for some of these things? Bread, Beef bourguignon, bananas (probably awfully simple but still) etc..???